
Cherry Pie

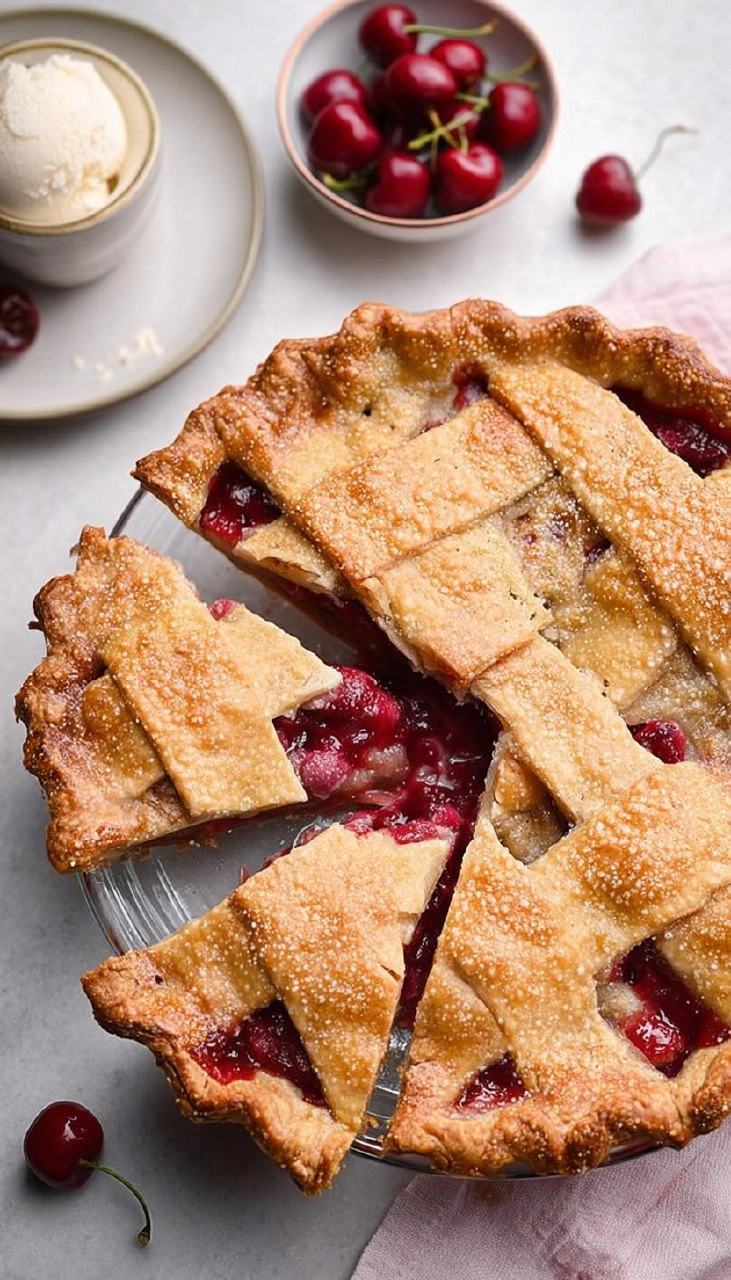
There’s something truly special about a homemade cherry pie. The way the buttery, flaky crust cradles that luscious, ruby-red filling is a sight to behold. Sweet-tart cherries bubble away as they transform into a warm, fragrant hug of summer goodness. Each slice is like a love letter to those sunny days when cherries are at their peak, making every bite a delightful reminder of summer gatherings, picnics, and backyard barbecues. The rich hues and the satisfaction of cutting into a beautifully baked pie are just a few reasons why cherry pie has captured the hearts of many.

I remember the first time I decided to whip up a cherry pie. It was a lazy summer afternoon, and my kitchen was filled with the sweet aroma of cherries mingling with buttery pastry. It turned out to be a labor of love; every step was worth it when my family gathered around the table, forks poised for the first taste. I promise this foolproof cherry pie recipe will bring the same joy to your kitchen. It’s not just any dessert; it’s a memory waiting to be made. So roll up your sleeves, and let’s get baking!
Table of Contents
Why You’ll Love This Recipe
- Simple & Quick: With a little prep time, you can create a lovely cherry pie to share with loved ones in just about 60 minutes.
- Irresistible Flavor: Fresh or frozen cherries offer a blend of sweetness and tartness, while the buttery crust adds a satisfying crunch.
- Eye-Catching Appeal: The beautiful lattice top makes this pie a showstopper, perfect for impressing guests at any gathering.
- Flexible Serving: Great for dessert, a midday snack, or even breakfast with coffee; cherry pie is versatile for any occasion.
- Diet-Friendly Options: Use alternative sweeteners or gluten-free pie crust for a modified version that suits different dietary needs.
Ingredients You’ll Need
- 2 foolproof all-butter pie crust: A good pie crust is essential for the base, and using all butter gives it that rich flavor. You can make your own or buy pre-made.
- 2 pounds cherries (pitted): Fresh cherries are ideal, but frozen ones work beautifully in this recipe. Ensure they are pitted for easy enjoyment.
- 3 tablespoons cornstarch: This thickens your filling, helping it set up perfectly without being runny.
- 1/2 cup granulated sugar (99g): This balances the tartness of the cherries. Adjust based on the sweetness of your cherries.
- 1/2 teaspoon salt: Just a hint of salt enhances the overall flavor of the pie.
- 3 teaspoons vanilla extract: Natural vanilla adds a warm depth to the cherry filling.
- 1/4 teaspoon almond extract: This subtle note complements the flavor of cherries beautifully.
- 1 tablespoon freshly squeezed lemon juice: Fresh lemon juice brightens the filling and enhances the cherry flavors.
- 2 tablespoons unsalted butter (cut into small cubes): Adding butter on top of the filling enriches the taste and adds to the overall texture.
- 1 large egg: For the egg wash, which gives the crust a golden finish.
- 2 teaspoons water: To mix with the egg for brushing on the crust.
- 2 tablespoons sparkling sugar (optional): For an extra crunch and sparkle on the top layer of crust.
How to Make Cherry Pie
- Prepare the Crust: Have ready and refrigerate one batch of the foolproof all-butter pie crust. Remove the dough from the fridge 10 minutes before rolling it out; this prevents cracking when you work with it.
- Roll Out Dough: Lightly flour your rolling pin and work surface. Roll the dough from the center outward until it’s about 1/8 to 1/4 inch thick and three inches larger than your pie pan.
- Transfer to Pan: Fold the dough in half, placing it into the buttered pie pan, and unfold carefully. Fit it down gently, ensuring no gaps remain, and prick the bottom with a fork to remove air bubbles.
- Trim Edges: Use kitchen scissors to trim the pastry overhang to about 1.5 inches from the rim of the pan.
- Chill the Crust: Cover with plastic wrap and refrigerate for at least 1 hour to help the crust maintain its shape while baking.
- Prepare Lattice Strips: Preheat your oven to 425°F (220°C). On a floured surface, roll out the remaining dough into a 12-inch circle. Cut into 10 strips using a pastry cutter; the width can be adjusted to your preference. Lay these strips on a baking sheet and refrigerate.
- Make Filling: In a saucepan over medium-high heat, combine the pitted cherries, 3 tablespoons cornstarch, 1/2 cup granulated sugar, 1/2 teaspoon salt, 3 teaspoons vanilla extract, 1/4 teaspoon almond extract, and 1 tablespoon lemon juice. Simmer for about 8 minutes, stirring constantly until thickened. Reduce heat and simmer for an additional 2 minutes before cooling to room temperature in a bowl.
- Prepare Egg Wash: Beat together one large egg with 2 teaspoons of water and set aside.
- Assemble Pie: Pour the cooled cherry filling into the prepared crust and dot with the cubed butter.
- Create Lattice: Arrange 6 strips of dough over the filling, weaving them by folding every other strip back and laying a perpendicular strip across. Unfold the folded strips to cover the perpendicular dough.
- Trim Lattice: Trim excess lattice to a 1/2 inch overhang, then roll the excess dough up tightly on the edge of the pie plate. Crimp the edges to seal.
- Brush with Egg Wash: Brush the lattice and edges with the egg wash and sprinkle with sparkling sugar if desired.
- Bake the Pie: Place the pie on a baking sheet and bake for 15 minutes. Reduce the oven temperature to 350°F (175°C) and continue baking for about 50 minutes or until the crust is golden and the filling is bubbling.
- Cool: Allow the pie to cool on a wire rack for at least 2 hours before slicing; this will help the filling set properly.
Storing & Reheating
To store your cherry pie, leave it at room temperature for up to 2 days. For longer storage, refrigerate in an airtight container for 3-4 days. If you want to keep it longer, freeze the pie for up to 3 months. Wrap it well to prevent freezer burn. When you’re ready to enjoy it, reheat in a 350°F (175°C) oven for about 20 minutes, until warmed through. Note that the crust’s texture might soften slightly, but it will still be delicious!
Chef’s Helpful Tips
- Ensure your butter is cold when making the crust; this will help achieve a flaky texture.
- Avoid overmixing the pie crust dough as that can develop too much gluten, resulting in a tough crust.
- If you’re using frozen cherries, there’s no need to thaw them; just add a minute or two to the cooking time.
- If the edges of the crust seem to brown too quickly, cover them with foil during the baking process.
- For extra flavor, consider mixing in a pinch of cinnamon or nutmeg with your cherry filling.
- Make the cherry filling a day ahead to let the flavors develop, and then prepare the crust when you’re ready to bake.
Cherry pie is more than just a dessert; it’s a celebration of flavor and childhood memories wrapped in a golden crust. This foolproof cherry pie recipe is guaranteed to charm your family and friends, whether they’re savoring it right out of the oven or enjoying it a day later with a scoop of ice cream. Experiment with variations by adding more spices or even a splash of bourbon for an adult twist. The joy is in the process of making it as much as it is in sharing, so dig in and create your own cherry pie memories!
Recipe FAQs
Can I use frozen cherries for this recipe?
How can I tell when my cherry pie is done baking?
Can I make the pie crust in advance?
What’s the best way to serve cherry pie?
⭐ If you make my Cherry Pie recipe, Awesome! I would love to hear from you. Please give it a star rating and review below! 👇

Cherry Pie
This Cherry Pie boasts an irresistible flavor from fresh cherries and a flaky all-butter crust. It’s an easy to prepare dish, making it a great treat for any occasion.
- Prep Time 60 minutes
- Cook Time 245 minutes
- Yield 1 1x
Ingredients
- 2 foolproof all-butter pie crust
- 2 pounds cherries pitted (fresh or frozen)
- 3 Tablespoons cornstarch
- 1/2 cup (99g) granulated sugar
- 1/2 teaspoon salt
- 3 teaspoons vanilla extract
- 1/4 teaspoon almond extract
- 1 Tablespoon freshly squeezed lemon juice
- 2 tablespoons unsalted butter cut into small cubes
- 1 large egg
- 2 teaspoons water
- 2 Tablespoons sparkling sugar optional
Instructions
- Prepare and refrigerate one batch of foolproof all-butter pie crust.
- Remove the dough from the fridge 10 minutes before rolling to prevent cracking. Flour a rolling pin and work surface, then roll out the dough from the center.
- Roll the dough until it is 3 inches larger than the pie pan, achieving a thickness of 1/8 to 1/4 inch.
- Fold the dough in half, place it in the buttered pie pan, and unfold it gently, ensuring it fits without gaps.
- Trim the dough overhang to 1 and 1/2 inches using kitchen scissors and cover the crust with plastic wrap.
- Refrigerate for at least 1 hour or up to 48 hours, or freeze for up to 2 months.
Notes
Using fresh cherries gives the best flavor, but frozen can be a convenient alternative.
Ensure the dough is not overworked to maintain a flaky texture.
Optional sparkling sugar can add a nice finish before baking.
Nutrition
- Serving Size: 1 slice
- Calories: 300
- Sugar: 20g
- Sodium: 180mg
- Fat: 15g
- Saturated Fat: 8g
- Unsaturated Fat: 7g
- Trans Fat: 0g
- Carbohydrates: 38g
- Fiber: 2g
- Protein: 3g
- Cholesterol: 40mg
Nutritional information is an estimate. The nutritional values for your final dish may vary based on measuring differences and products used.