
Cloverleaf Rolls

Cloverleaf Rolls are the perfect addition to any meal, boasting a charming appearance and tender, buttery texture. Their delightful pull-apart feature makes them not just a side dish, but a culinary experience in themselves. Each fluffy roll is encased in a golden-brown exterior, and the moment you break one open, you’re welcomed by warmth and pillowy softness inside. These rolls are often a family favorite, evoking nostalgia of holiday dinners and special gatherings, where the air is filled with the comforting aroma of freshly baked bread.
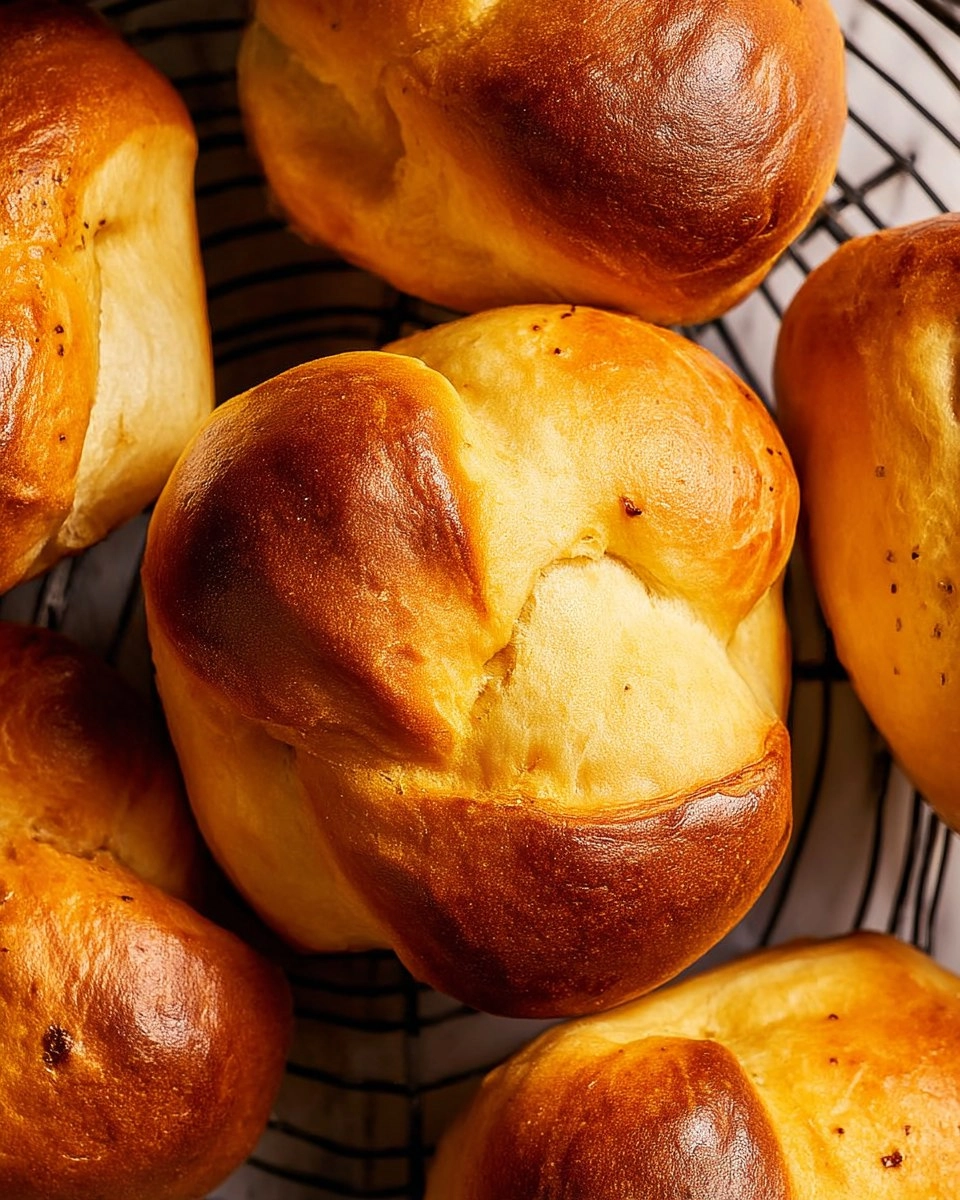
From the first time I pulled a batch of these Cloverleaf Rolls from the oven, I was hooked. It was a cold Sunday afternoon, and the warmth radiating from the bread created a cozy atmosphere in my kitchen. I remember serving them fresh out of the oven, and they disappeared in no time! Soft, buttery, and irresistibly delicious, this recipe combines simplicity and satisfaction, making it a go-to for both special occasions and everyday weeknight dinners. Trust me, after tasting these rolls, you’ll want to make them again and again!
Table of Contents
Why You’ll Love This Recipe
- Simple & Quick: Only 55 minutes of prep, plus rising time to create amazing flavor.
- Irresistible Flavor: Buttery and tender, these rolls become soft pillows of deliciousness on your plate.
- Eye-Catching Appeal: Their unique cloverleaf shape is fun, cute, and sure to impress your guests.
- Flexible Serving: Perfect for any meal – from festive holidays to casual dinners.
- Diet-Friendly Options: Easily adapt for gluten-free flour or dairy substitutions!
Ingredients You’ll Need
- 1 envelope active dry yeast: This will give your rolls the lift they need. Make sure to use fresh yeast for best results!
- 4 tablespoons sugar (divided use): Helps activate the yeast and contributes to the sweetness of the dough.
- ¼ cup warm water: Temperature is key; it should be around 110°F to properly activate the yeast without killing it.
- 4 tablespoons butter (diced): Adds richness and buttery flavor to the dough.
- 1 cup milk: Used for its moisture and to enrich the rolls. Whole milk provides the best results, but you can use low-fat.
- 1 teaspoon salt: Balances the sweetness and enhances the overall flavor.
- 2 eggs (beaten separately and divided use): Provides richness and helps bind the dough. Be sure to separate them; one will be for an egg wash.
- 3 ½ to 4 cups all-purpose flour (divided use): This is necessary for the roll’s structure. Start with 3 ½ cups and add more if needed for a soft dough.
How to Make Cloverleaf Rolls
- Prep the Oven and Muffin Tin: Set your oven to 400°F, but don’t preheat it just yet. Grease a 12-cup muffin tin in preparation for those cute cloverleaf shapes!
- Activate the Yeast: In your stand mixer bowl, mix together 1 tablespoon of sugar, the envelope of active dry yeast, and warm water. Allow the mixture to rest for about 5 minutes until it becomes bubbly and frothy.
- Make the Milk Mixture: In a small saucepan, combine the diced butter, remaining sugar, and salt with the milk. Heat this mixture gently to about 110°F so the butter melts and everything blends well. Whisk in one beaten egg once it cools slightly.
- Knead the Dough: Pour the milk mixture into the activated yeast. Add 1½ cups of flour and mix with the dough hook on low speed. Gradually add the remaining flour, about 2½ to 3½ cups more, until the dough forms a soft ball. Knead on medium speed for about 5-6 minutes until soft and pliable.
- First Rise: Transfer the dough to a greased bowl, turning it to coat. Cover the bowl with a clean cloth and let it rise in a warm spot until it doubles in size, approximately 45-60 minutes.
- Shape and Second Rise: After rising, punch the dough down gently and turn it out onto a floured surface. Divide it into 36 walnut-sized pieces. Shape each piece into a ball and place three in each muffin cup. Cover and let them rise until puffy, about 20 minutes.
- Egg Wash and Bake: Brush the tops of the rolls with the remaining beaten egg for that lovely golden color. Bake in your preheated 400°F oven for 12 to 15 minutes or until the rolls are golden brown and cooked through. Let them cool in the pan for about 5 minutes before transferring to a cooling rack.
Storing & Reheating
To store your Cloverleaf Rolls at room temperature, place them in an airtight container lined with a paper towel for around 2-3 days. For longer storage, keep them in the refrigerator for about a week. You can also freeze the rolls; wrap them tightly in plastic wrap, then place them in a freezer-safe bag. They’ll stay fresh for up to three months. When you’re ready to enjoy them again, reheat in a 350°F oven for about 10 minutes to refresh their soft texture.
Chef’s Helpful Tips
- Avoid risking the dough’s rise by ensuring your water is warm, not hot. Too much heat can kill the yeast!
- If your rolls aren’t browning, consider increasing the baking time slightly, keeping an eye on them to prevent burning.
- For extra flavor, you can add herbs or garlic powder to the dough!
- If you find the dough too sticky, don’t hesitate to add a little more flour, but use it sparingly to maintain that soft, tender texture.
- For a fun twist, try adding cheese or diced herbs into some of the dough balls before shaping.
Soft, buttery, and oh-so-fluffy, these Cloverleaf Rolls will surely become a staple in your kitchen. Each rolling ball brings a slice of comfort that makes mealtimes special. Baking them gives you a chance to unleash your creativity in the kitchen, whether it’s a holiday feast or a warm dinner gathering. I wholeheartedly invite you to experiment and make this recipe your own. Enjoy every bite, and remember — there’s nothing quite like the aroma of homemade bread wafting through your home!

Recipe FAQs
Can I make Cloverleaf Rolls ahead of time?
Can I freeze the dough before baking?
What if my rolls did not rise?
How can I give these rolls additional flavor?
⭐ If you make my Cloverleaf Rolls recipe, Awesome! I would love to hear from you. Please give it a star rating and review below! 👇

Cloverleaf Rolls
These Cloverleaf Rolls feature a soft, fluffy texture with a buttery flavor. Perfect for quick dinners or family gatherings, this easy recipe will impress everyone!
- Prep Time 55 minutes
- Cook Time 155 minutes
- Yield 12 servings 1x
Ingredients
- 1 envelope active dry yeast
- 4 tablespoons sugar (divided use)
- ¼ cup warm water
- 4 tablespoons butter (diced)
- 1 cup milk
- 1 teaspoon salt
- 2 eggs (beaten separately and divided use)
- 3 ½ to 4 cups all-purpose flour (divided use (~550g weighed))
Instructions
- Prepare by greasing a 12-cup muffin tin and preheating the oven to 400°F towards the end of the second rise.
- In a stand mixer bowl, combine yeast with 1 tablespoon of sugar and warm water, then let it stand for 5 minutes until bubbly.
- In a small saucepan, heat butter, milk, remaining sugar, and salt to 110°F, allowing butter to melt. Whisk in the beaten egg.
- Add the milk mixture and 1-½ cups of flour to the yeast mixture. Knead with the dough hook on low speed, gradually adding the remaining flour until a soft dough forms.
- Place the dough in a greased bowl and let it rise in a warm spot until doubled in size, about 45-60 minutes.
- Punch down the dough and turn it out onto a clean surface. Shape into 36 walnut-sized balls and place 3 balls in each muffin tin cup. Cover and let them rise until puffy, about 20 minutes.
- Brush the rolls with the remaining beaten egg. Bake for 12 to 15 minutes at 400°F until golden. Allow to cool in the pan for 5 minutes before transferring to a cooling rack.
Notes
The dough should be soft and pliable after kneading. Adjust flour as needed until the right consistency is achieved.
Ensure your milk mixture does not exceed 120°F to keep the yeast active.
Nutrition
- Serving Size: 1 roll
- Calories: 150
- Sugar: 2g
- Sodium: 150mg
- Fat: 5g
- Saturated Fat: 3g
- Unsaturated Fat: 2g
- Trans Fat: 0g
- Carbohydrates: 21g
- Fiber: 1g
- Protein: 4g
- Cholesterol: 30mg
Nutritional information is an estimate. The nutritional values for your final dish may vary based on measuring differences and products used.